Pictures are a great way to showcase members in your CWA Local’s social media, newsletter, and website communications. Pictures are also a great way to illustrate the work that your members are doing and demonstrate to those outside the union how much of an impact workers make in their communities. By following a few simple suggestions, you can take and share better pictures that your members will be glad to see themselves in.
You don’t need an expensive camera to take great photos - even the cameras on most smartphones are up to the task. And like any tool, the best camera is the one you have with you when you need it.
Tip 1: Take lots of pictures.
By taking lots of pictures at different angles, at different distances, and in different light you’re increasing the chance that some of those pictures are something that you’d be really proud to use. When taking posed shots, make sure you’re taking at least three or four shots so you’re not catching someone blinking or looking away.
Tip 2: Send using the highest resolution available.
Once you’ve taken a great photo, don’t send other people a low-resolution file they can’t use! Low-resolution photos look fuzzy on larger screens, lose detail when they are cropped, and don’t look good when printed on flyers or in print publications. Sometimes reporters ask for high-resolution photos to use to accompany their stories on CWA actions.
We suggest you submit photos to your Local, District, or to CWA national by email rather than text message to transmit the file at the highest possible resolution.
On an iPhone, tap “Photos,” select a photo, click the “Share” icon, select any additional pictures you’d like to send, and select the email app. Once you’ve composed the message and tapped “Send” you’ll be prompted to select the size of the file: Small, Medium, Large, or Actual Size. Always click Actual Size to include the highest resolution photo.
On an Android device, go to your photo gallery, select one of the photos you’d like to send and click the “Share” icon. Select any additional photos and select the email app to send. Depending on the device and the email programs you use, you may be prompted to select a size when making the attachment. Be sure to always include the largest size (highest number of MBs) when attaching the pictures to the email.
On Apple devices, the “Share” icon looks like this: 
On Android devices, the “Share” icon looks like this: 
You can also submit photos to CWA using the CWA STRONG app, which allows for high-quality image upload.
If you are sharing a lot of photos from your computer that you have taken using a traditional camera, using a file sharing service like Google Drive or Dropbox or a photo sharing service like Google Photos or Flickr are also good options.
Tip 3: When possible, use sunlight.
Sunlight, or “natural lighting,” is almost always going to result in a better picture than indoor light. Cloudy days can offer the best outdoor lighting since direct sunlight will often result in hard shadows, and pictures when both the photographer and the subject are in the shade will usually turn out really well.
Tip 4: Get Close
Great photos have a subject, a person or thing that the photo is about. The best pictures are not pictures of something or someone, they are pictures about something or someone. Get some shots of your whole group, but once you’ve done that spend some time taking close-up shots of individuals or small groups.
Getting close will allow you to capture the expression on peoples’ faces. It allows someone who looks at the photo to see the eyes of the person in the picture, which is incredibly important in creating connection to a photograph and creates a sense of closeness that a group shot often lacks. These shots will often tell a more interesting story that a group shot would.
Tip 5: Pose your subjects
When taking a picture of a person or a group of people, don’t be shy about asking them to stand a certain way or move more closely together to get the picture you want. If you’re taking action shots, ask people to repeat their actions, hold up their signs, or do something specific if you think it will make an interesting story.
Tip 6: Think about the story you want to tell.
When you head out with your camera, think about the story that you want to be telling to your members. Do you want to tell a story about a stewards training? Think about taking pictures of your stewards standing around training material discussing and pointing. Are you highlighting a group of members? A group shot with fists raised might be the best vehicle for telling their story. Get a few pictures with your subjects smiling and a few with your subjects looking serious. Pictures build upon whatever you’re putting in writing, so think about what you’re trying to say before you start shooting and give yourself options.
Tip 7: Play with your camera/flash settings.
Try taking some pictures with flash and some without to see which results you like better. HDR (High Dynamic Range) is a feature found on many cameras and smartphones. If shadows are too dark or some area is washed out with light, turn on HDR, which will automatically correct uneven lighting. You'll also want to make sure you’re taking photos at the highest resolution possible from your device.
Another setting you should turn on is the grid, especially on your smartphone, which will help you compose pictures using the Rule of Thirds.
On iPhone: Settings > Camera > Grid.
On Android: Settings > System Apps > Camera > Grid.
Tip 8: Know the Rule of Thirds

The Rule of Thirds is really more of a guideline than a rule, but keeping it in mind can lead to better photo compositions.
When someone sees a picture there are certain places where the eye naturally wants to look, and when you’re composing your picture those places are where your subject should be. Imagine a grid of two vertical and two horizontal lines over your picture (or turning the grid on in your camera settings) and compose your action shots so that your subject is located along one of the lines or at an intersection.

Look at this picture from the 2016 Verizon strike. The viewer’s gaze naturally focuses on the woman with the bullhorn, and the picture conveys a sense of movement and purpose.
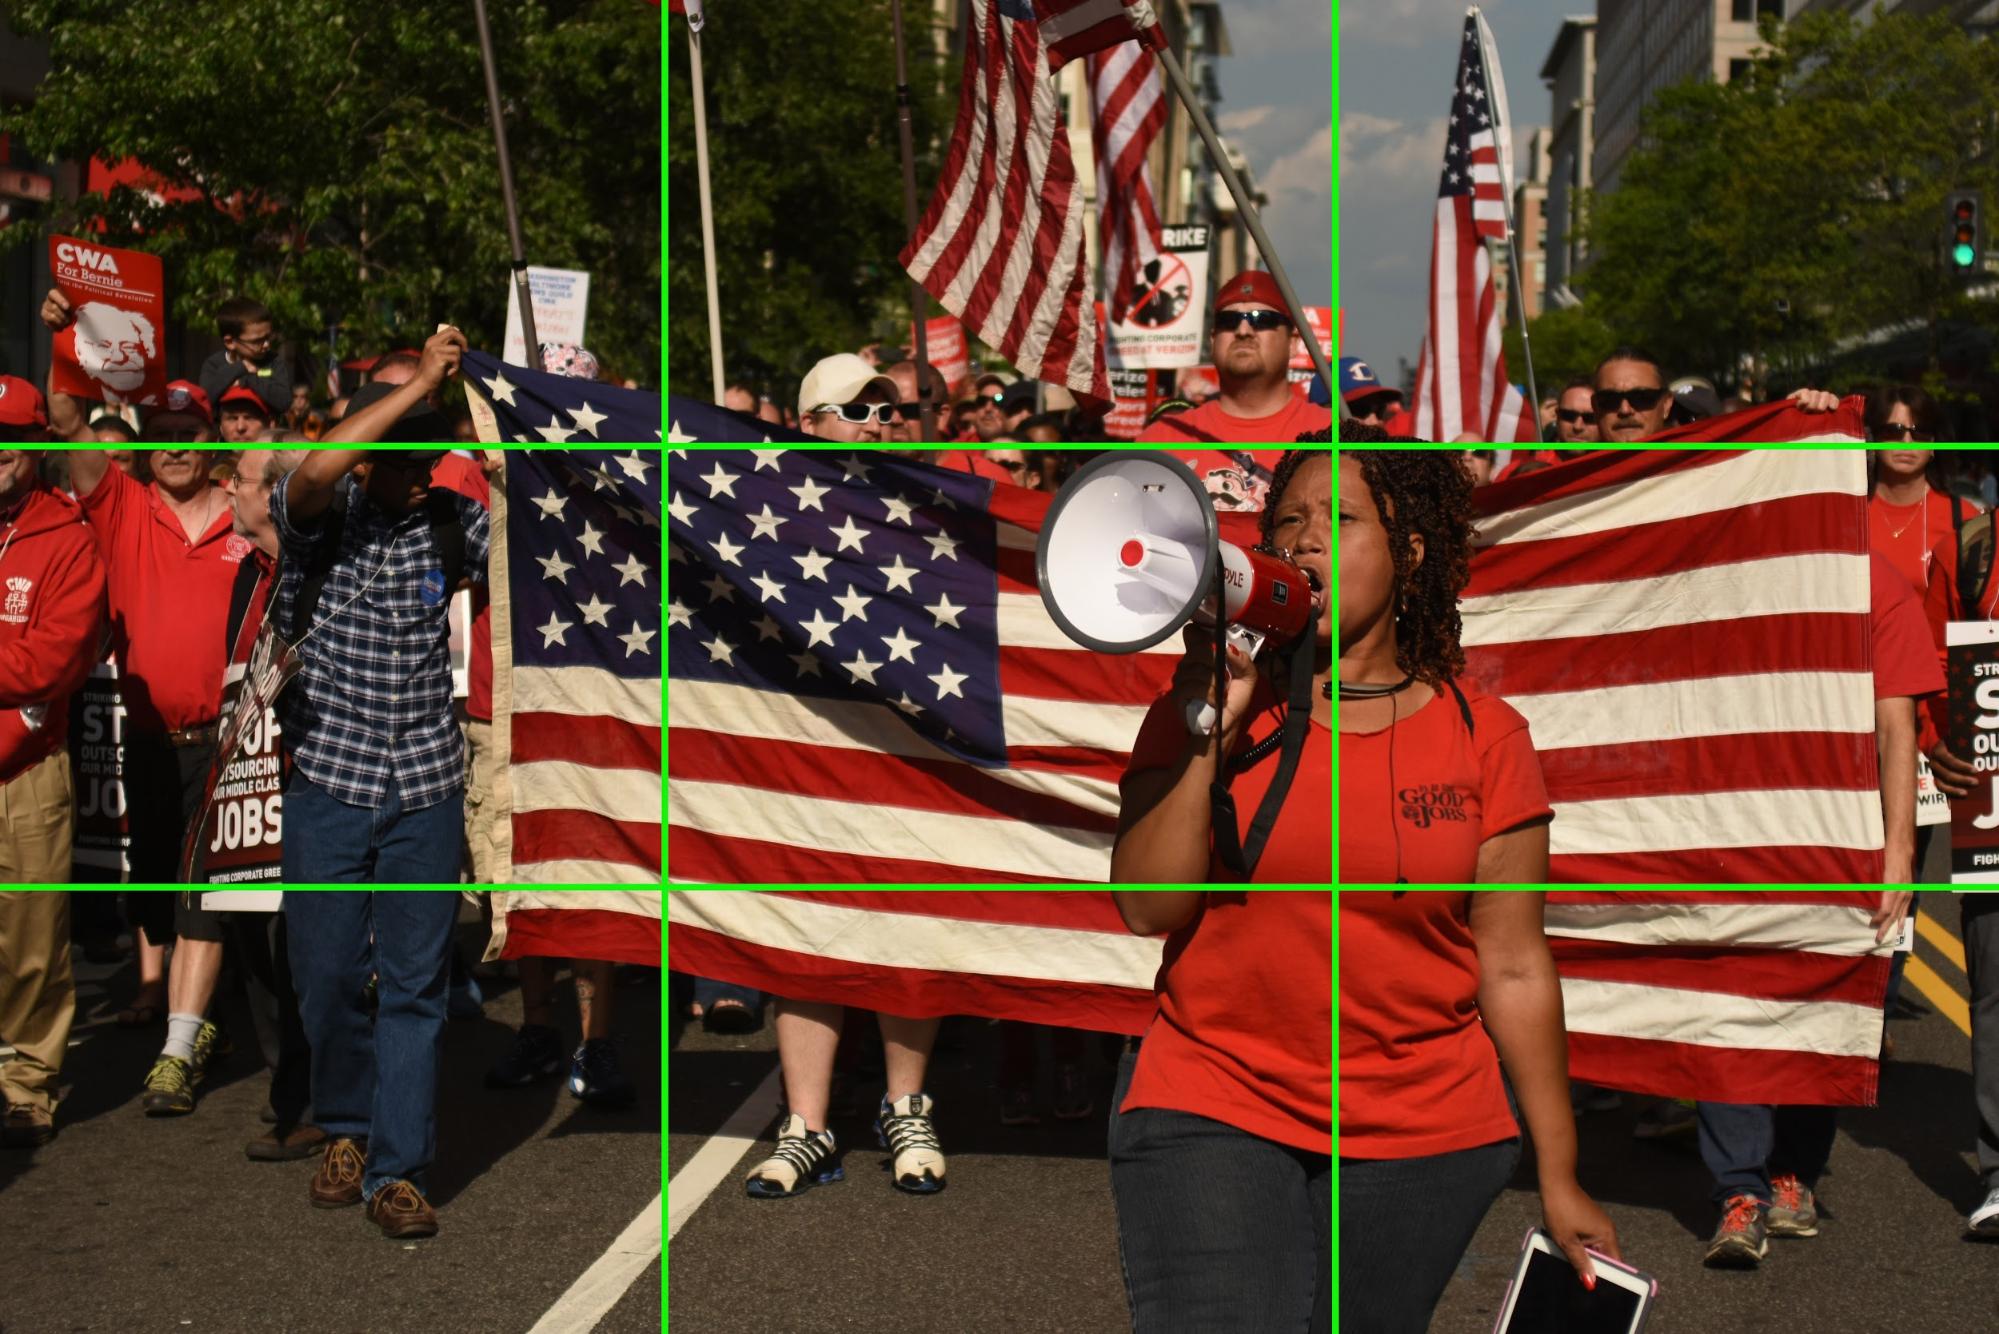
Look at the picture again with a grid demonstrating the Rule of Thirds. You’ll see the subject is positioned right along the right-side grid line, and her face is near the top-right intersection of the grid lines.
There are a lot of great guides and tutorials online about taking better pictures. For the beginner we’d recommend:
Lifehacker’s Basics of Photography: The Complete Guide